
16:9 how-to guide
How to Extend an Image to 16:9 Without Cropping
A 16:9 frame is easy to create without sacrificing the subject. The key is to expand the canvas, generate the missing surroundings, and leave the original photo intact instead of cropping or stretching it.
Quick answer
To extend an image to 16:9 without cropping, keep the original photo unchanged, enlarge the canvas horizontally or vertically until its width-to-height ratio is 16:9, and use AI outpainting to fill only the empty area. Review the generated edges, then export at the pixel dimensions your destination requires.
What does changing an image to 16:9 actually mean?
A 16:9 image is 16 units wide for every 9 units high. The ratio describes the shape, not one required resolution. A 1600 × 900 image and a 1920 × 1080 image are both 16:9.
If your source is narrower than 16:9, preserve its height and expand the canvas width using height × 16 ÷ 9. For example, a 1200 × 900 image can sit unchanged in a 1600 × 900 canvas, with 400 new horizontal pixels distributed to the left, right, or both sides.
If the source is wider than 16:9, preserve its width and increase canvas height using width × 9 ÷ 16. In either case, the original content stays intact and only the surrounding canvas grows.
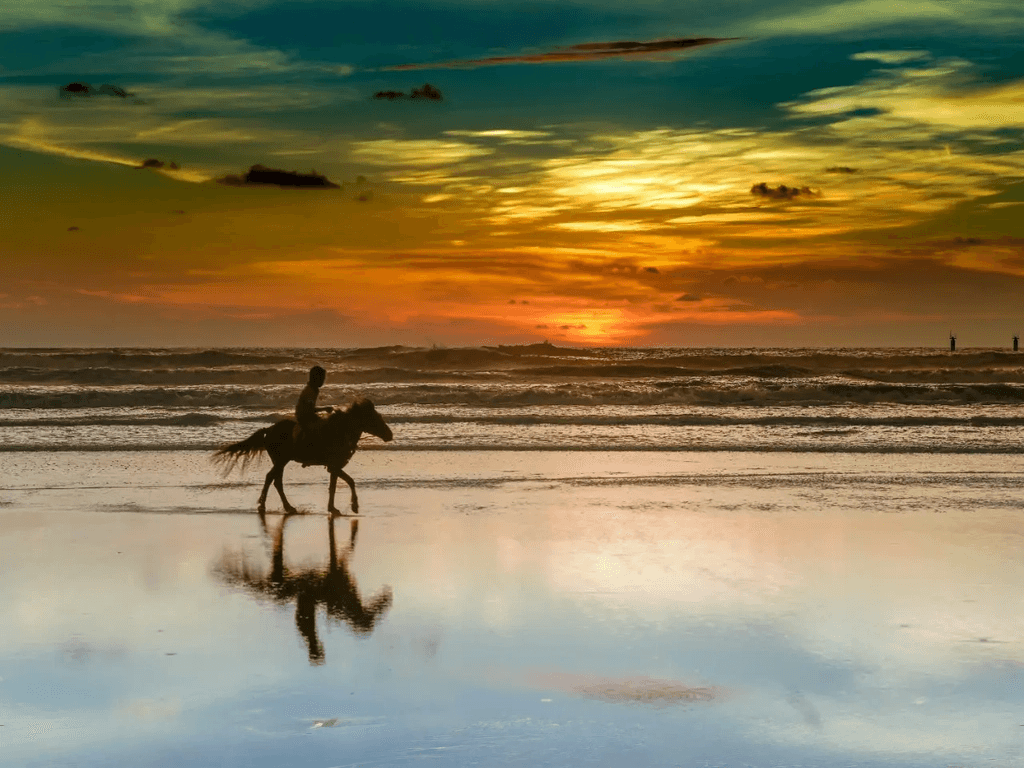
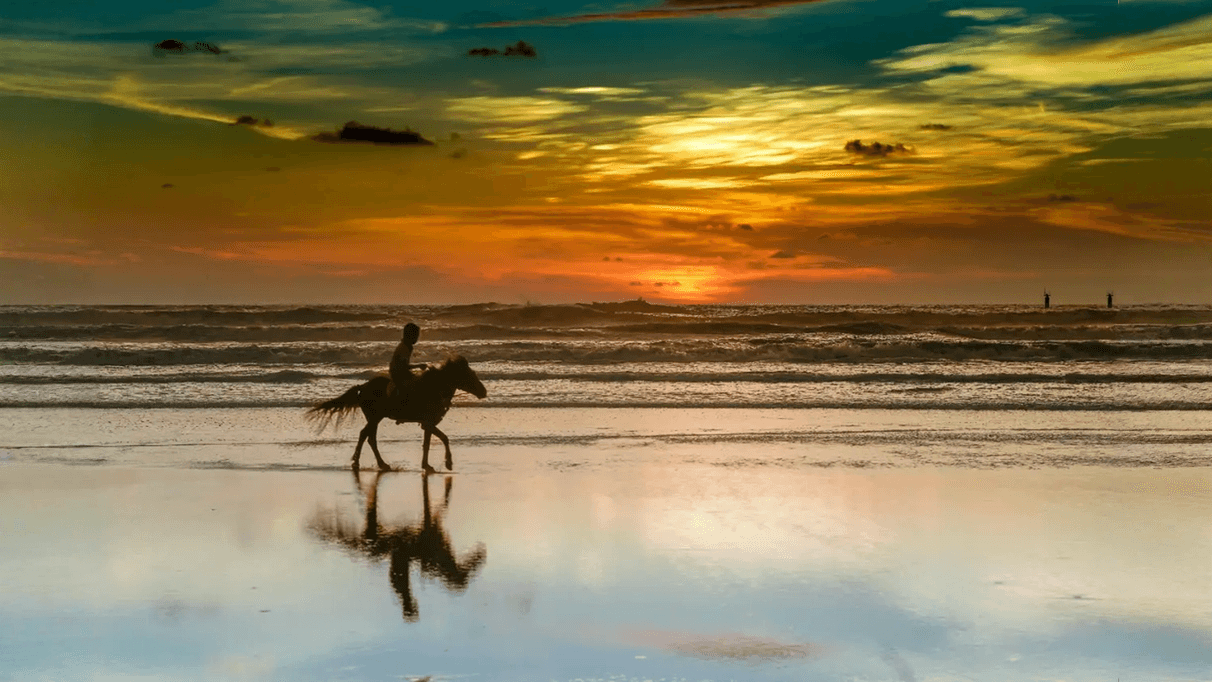
16:9 extension example: before and after
This project-owned example begins with a 4:3 photo. The 16:9 version keeps the horse and original scene visible while AI creates additional landscape on both sides.
Why extending is different from cropping, stretching, or padding
| Method | Original content | New surroundings | Use it when |
|---|---|---|---|
| AI extend | Can remain intact | Generated to match the scene | You need a natural full-frame 16:9 image |
| Crop | Outer areas are removed | None | The source already has disposable space |
| Stretch | Everything is distorted | None | Avoid it for photographs |
| Add padding | Remains intact | Blank or solid-color space | A designed border is acceptable |
How to extend an image to 16:9 without cropping in five steps
Start with the best available original
Upload the original file rather than a screenshot or a compressed copy. Check that the subject, text, logo, and details you need to preserve are already clear before you expand the canvas.
Select a 16:9 output
Choose the 16:9 preset in the image extender. The target shape should be wider than it is tall, but the exact pixel dimensions can be decided at export.
Position the original inside the new frame
Keep the subject where the final design needs it. Center the source for balanced expansion, or leave more generated space on one side when you need room for a headline, logo, or interface element.
Generate only the missing surroundings
Let AI outpainting fill the empty canvas around the fixed source. If a prompt is available, describe the missing background, lighting, and texture instead of restating the subject that is already present.
Inspect the join and export
Zoom in where the original meets the generated area. Regenerate if you see repeated objects, broken lines, mismatched shadows, altered text, or warped details. Export only after the full 16:9 composition looks coherent.
How should you position the subject in a 16:9 frame?
Center the source
Expand both sides evenly for symmetrical scenes, portraits, and simple presentation backgrounds.
Place the subject left
Add more space on the right when a headline, button, or product message will occupy that side.
Place the subject right
Add negative space on the left for layouts whose text or interface controls appear there.
Quality checklist before you export
- ✓ The original subject, logo, and text have not been altered.
- ✓ The generated area continues the same light direction, color, and perspective.
- ✓ Straight edges cross the old image boundary without bends or breaks.
- ✓ Patterns, people, plants, and background objects are not repeated unnaturally.
- ✓ The subject has enough breathing room for the final layout.
- ✓ The exported dimensions are exactly 16:9, such as 1600 × 900 or 1920 × 1080.
Common mistakes that make a 16:9 extension look artificial
Stretching instead of extending: changing width alone makes faces, products, and circles look unnaturally wide.
Generating too much at once: a very small source gives the model less context and makes continuity harder. Use the largest clean original available.
Overloading the prompt: ask for the missing background first. New subjects or dramatic scene changes can compete with the original composition.
Forgetting the delivery layout: platform overlays, titles, and logos still need safe space. Position the source before generating, not after.
If you are still deciding between reframing methods, browse the AI image extender tools guide or return to the blog.
Frequently asked questions
Can I make an image 16:9 without cropping it?
Yes. Increase the canvas to a 16:9 shape and fill the added area with AI outpainting. This keeps every original pixel available while creating new background around it. Avoid changing width and height independently, because that stretches the photo instead of extending it.
What size should a 16:9 image be?
Any dimensions with a width-to-height ratio of 16:9 are valid. Examples include 1600 × 900 and 1920 × 1080 pixels. Choose the final pixel size for your publishing destination; the aspect ratio controls the shape, while pixel dimensions control resolution.
Does changing a photo to 16:9 reduce quality?
Expanding the canvas does not require removing or stretching the original area. However, generated regions can contain softer detail or visual mistakes. Start with the highest-quality source you have, inspect the new edges at full size, and resize only after the composition is final.
What should I prompt when extending an image to 16:9?
Describe only what should continue beyond the frame, such as “continue the softly lit studio wall and floor.” Mention lighting, surface, or scenery when necessary. Keep the first prompt short; adding unrelated objects makes the extended area harder to match.
Should I add space equally to both sides?
Not always. Equal expansion works for a centered composition. Asymmetric expansion is better when the subject should sit on one side or when the layout needs negative space for text. Decide where the image will be used before positioning the original inside the 16:9 canvas.
Make your image 16:9 now
Upload your original, choose 16:9, and let AI Image Extender create the missing scene without cropping away the subject.